English
Views: 0 Author: Site Editor Publish Time: 2026-09-23 Origin: Site


Purchasing a sandblast cabinet based strictly on the physical dimensions of the largest part is a common, expensive mistake. Many buyers assume a part will easily fit if it measures just under the internal boundaries. They soon realize they lack the necessary room to maneuver.
True working capacity requires accounting for operator maneuverability, blast gun angles, and the hidden bottleneck of workshop air supply. An abrasive stream needs physical space to fan out and strike metal efficiently. Without adequate clearance, you sacrifice both speed and surface quality.
This guide breaks down the critical dimensions, volume constraints, and airflow requirements needed to select a cabinet. You will learn how to build an efficient setup supporting continuous production without forcing unnecessary infrastructure upgrades. Getting your sandblast cabinet size right saves time, effort, and future frustration.
You cannot simply match the length of your part to the internal width of a cabinet. A successful abrasive blasting process relies heavily on empty space. We call this space the working envelope. It dictates how well you can move, see, and clean components.
Parts require a minimum of five to six inches of clearance on all sides. The blast stream needs this physical distance to fan out effectively. If you hold the blast nozzle too close, the abrasive hits a tiny focal point. This creates uneven surface profiling. It also forces the abrasive to ricochet directly back at the viewing window. Adding a 50% margin to your maximum part size ensures proper standoff distance. You gain enough room to sweep the gun naturally across the surface.
Consider the reality of handling heavy metallic parts inside a confined steel box. Flipping an engine block or an automotive rim is physically demanding. Doing it while wearing thick, stiff blasting gloves adds another layer of difficulty. If your cabinet barely fits the part, you cannot rotate it safely. You will end up scraping the component against the interior walls. A larger internal volume allows you to roll or flip parts safely. This prevents damage to the cabinet lining and saves your knuckles from severe bruising.
Workshops often handle long, narrow items like exhaust pipes, suspension arms, or drive shafts. You do not always need a massive industrial unit for these. Instead, calculate the diagonal interior width. Measure from the bottom left rear corner to the top right front corner. Placing long parts diagonally maximizes your existing footprint. However, remember this positioning limits rotation. You must plan for frequent repositioning when cleaning all sides of a long pipe.
Manufacturers often list the overall exterior dimensions prominently. Never assume overall dimensions equal working dimensions. Exterior bulk includes the dust collection housing, lighting fixtures, and the bottom media hopper. The usable grate space is often significantly smaller. Always check the specific internal working dimensions before making a decision.
Table: Minimum Working Envelope Clearances
| Part Type | Max Part Dimension | Recommended Internal Width | Required Action Inside Cabinet |
|---|---|---|---|
| Brake Caliper | 10 inches | 20 - 24 inches | Full manual lifting and flipping |
| Motorcycle Frame | 36 inches | 48 - 54 inches | End-to-end rotation, diagonal fit |
| Engine Block (V8) | 28 inches | 42 - 48 inches | Hoist drop, spinning on turntable |
| Exhaust Pipe | 40 inches | 46 inches (Diagonal) | Static placement, flip once |
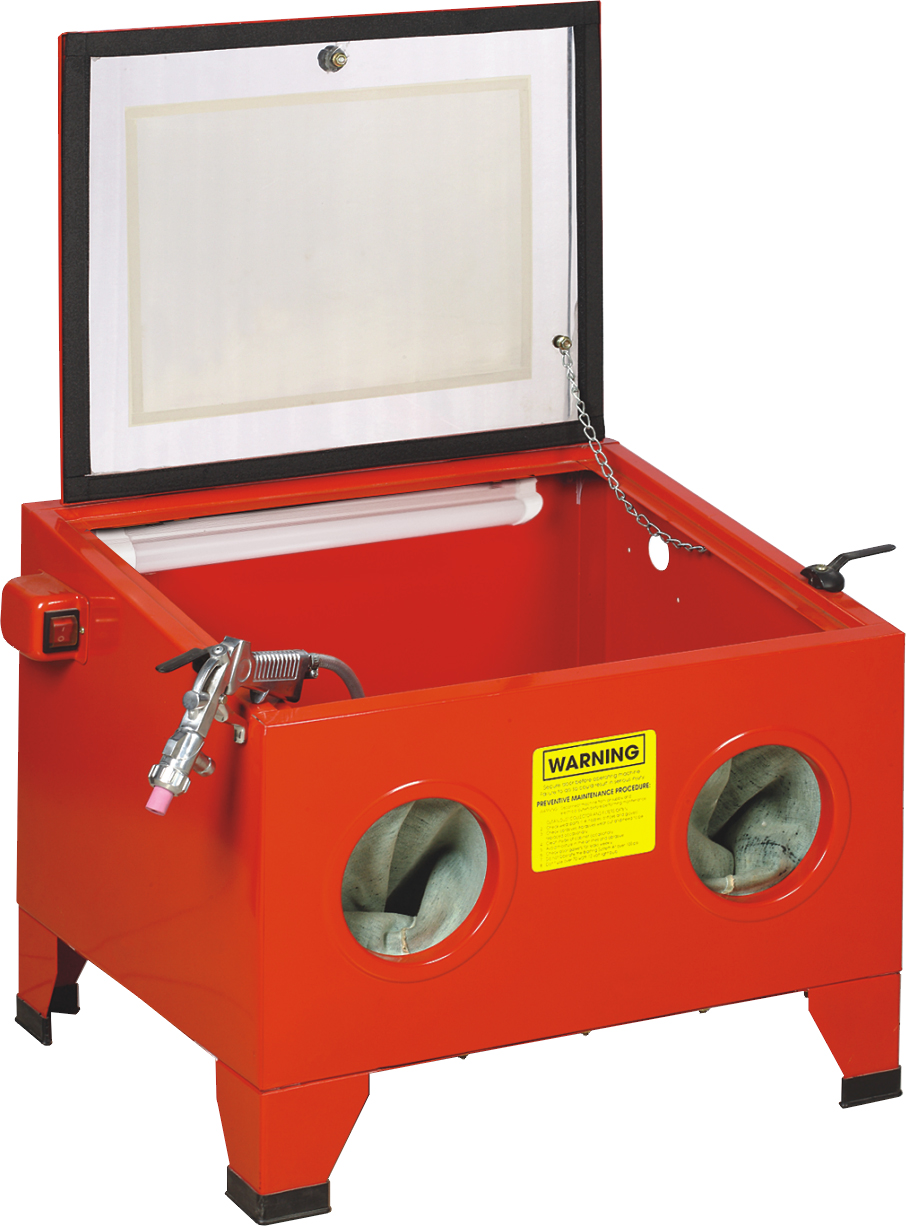
Many workshops buy the biggest cabinet they can fit on the floor. They completely ignore the air supply producing the actual work. Air compressor output acts as a hard limit on your blasting efficiency. A massive working envelope means nothing if you lack the air to drive the media.
Larger cabinets physically require larger nozzles. A small nozzle inside a giant enclosure cleans too slowly. It also fails to generate enough localized air movement to push dust toward the extraction vent. Stepping up to a larger nozzle directly impacts your required CFM (Cubic Feet per Minute) and PSI. If your nozzle demands 15 CFM but your compressor only delivers 10 CFM, system failure is inevitable. You will experience massive pressure drops. The abrasive media will barely trickle out of the gun.
Evaluate your existing compressor carefully. Sizing up a cabinet without upgrading a compressor leads to severe pressure lag. Most standard piston compressors possess a 50% duty cycle. They need time to cool down. Blasting is a continuous demand application. If you drain the tank faster than the pump refills it, you must stop working. Waiting for air pressure to rebuild destroys workshop productivity. It also results in uneven surface profiling. Parts blasted at 90 PSI look completely different than parts blasted at 60 PSI.
Internal cabinet volume dictates the necessary CFM of the integrated dust collector. A large cabinet holds a massive volume of air. When you blast, paint and rust vaporize into a thick cloud. A small dust collector cannot pull enough vacuum to clear a large box. Poor extraction destroys operator visibility instantly. You cannot clean what you cannot see. Match your dust collector’s extraction rate to the internal cubic volume of the cabinet enclosure.
Best Practices for Air Management:
Manufacturers categorize equipment based on internal volume, grate load capacity, and construction materials. Understanding these categories helps you align your workshop needs with the correct physical footprint.
These units fit perfectly into home garages or small restoration shops. They consume minimal floor space and run efficiently on smaller air compressors.
Mid-range models bridge the gap between hobbyist repairs and daily professional fabrication. They feature thicker steel construction and better lighting.
Industrial enclosures handle massive components and run continuously across multiple shifts. They integrate heavily with advanced dust management systems.
Internal dimensions only matter if you can actually get the part inside. Loading awkward or dangerously heavy workshop parts demands the correct door configuration. Operator ergonomics play an equally vital role in daily use.
Side doors represent the industry standard. They work perfectly for general use and hand-loaded items. However, they carry distinct pros and cons. They are inexpensive and easy to maintain. Conversely, they are highly prone to media spillage. Abrasive tends to pool near the lower door lip. Every time you open the side door, media dumps onto the floor. If the foam seals wear out, dust escapes directly into your workshop.
Clamshell designs open the entire top half of the cabinet. They are essential for dropping in heavy parts via a shop crane or overhead hoist. Sliding a massive transmission casing through a side door risks serious back injury. A top-loading unit completely eliminates weight-bearing strain on the operator. Keep overhead clearance in mind. You need enough ceiling height to fully open the lid and maneuver your hoist mechanism.
Evaluate glove port placement carefully. A cabinet sized perfectly for the part but poorly for the operator causes severe fatigue. If armholes sit too high, your shoulders burn within ten minutes. If ports sit too low, you spend hours hunched over, straining your lower back. Look for adjustable leg heights. The viewing window must align naturally with your line of sight. Comfortable operators work faster, produce better finishes, and avoid repetitive strain injuries.
Common Mistakes in Ergonomics:
Use this structured approach to narrow down your options. Following these sequential steps prevents premature purchases based solely on aesthetics or footprint.
Sizing a sandblast cabinet requires a careful balance between part maneuverability, shop floor availability, and air supply capacity. Failing to respect the 50% working envelope rule leads to cramped, inefficient processing. Ignoring your air compressor's limitations transforms a powerful tool into a frustrating bottleneck.
Err on the side of a slightly larger internal working envelope only if your compressor can support the necessary air and media flow. You can always blast small parts in a large box, but you can never force large parts into a small one. Properly sized equipment protects your operators from physical strain while delivering consistent, high-quality surface finishes.
To finalize your setup, measure your largest common parts today and check your compressor's CFM rating. Consult a detailed product catalog or use an online sizing calculator to match your exact measurements with specific industrial or benchtop models.
A: Yes, but it is highly inefficient. A small compressor lacks the CFM to sustain pressure. You will experience frequent stops to let the air pressure rebuild. This intermittent blasting destroys your workflow and creates inconsistent surface textures on the metal.
A: Overall dimensions include the entire exterior structure. This encompasses the media hopper, legs, dust collector housings, and light fixtures. Working dimensions measure only the internal usable blast zone above the steel grate where your parts actually sit.
A: No. The 90-liter capacity is typically too small for standard automotive rims. A car rim requires substantial room for rotation and gun clearance. This compact size is best suited for smaller components like brake calipers, brackets, and motorcycle hardware.
A: You should leave at least three feet of clearance around access points. This provides ample space for door swings and operator movement. Additionally, leave sufficient room near the dust collector for filter changes and easily accessible space underneath to refill abrasive media.